
Greensmere Golf & Country Club is a 36-hole championship golf course in Ottawa, just ten minutes west of Kanata. Situated on almost 400 acres of land, this is a highly desirable golf course to play. A tranquil setting suitable for both competition and pleasure. You are invited to indulge in the beauty of nature surrounding you.
Greensmere Golf & Country Club has been designed to eliminate slow play and challenge golfers of all skill levels. The tees, fairways and greens are bent grass. According to many, Greensmere has the best greens in the Ottawa Valley.
Choose from our renowned and popular Premiere course, Greensmere’s original 18-hole championship golf course or our spectacular new 18-hole Legacy course, named in memory of golf course designer and owner John Green.
Front
Back
Total Yards
Rating and Slope
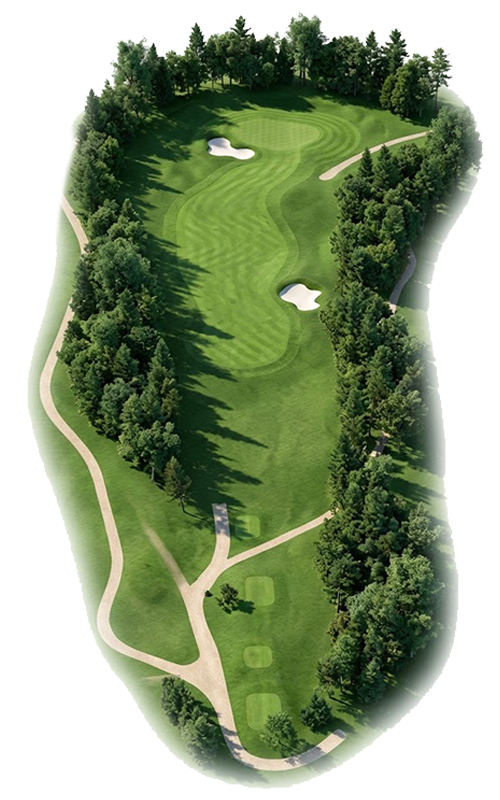
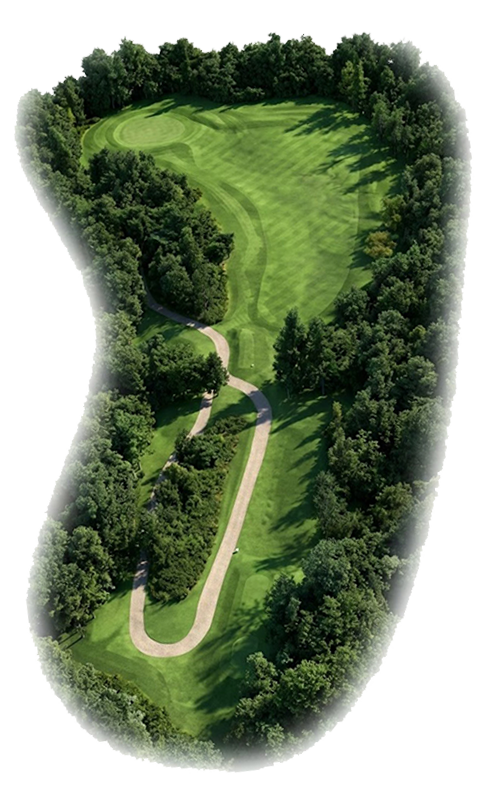
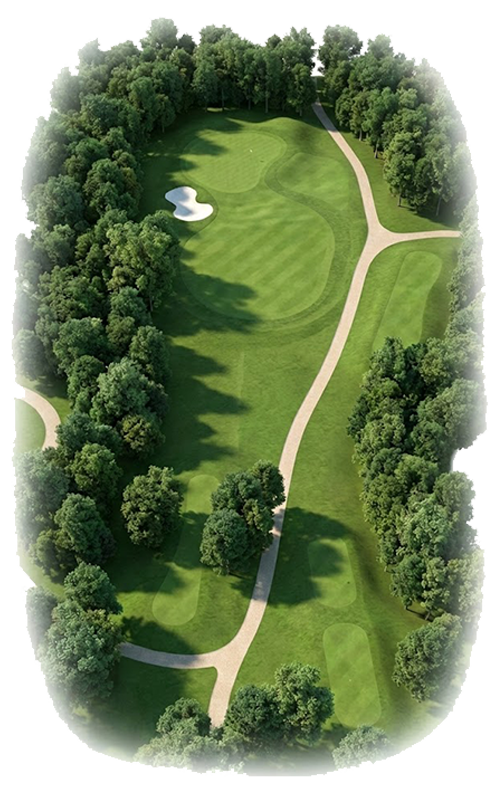
Hole 1
Yardage
Par
4
Men's Handicap
15
Women's Handicap
15
Pro Tip
Aim for the left side of the fairway off the tee to avoid the right-side trees and position yourself for a clearer approach. For your second shot, target the center of the green, as the bunkers on the left can complicate a more aggressive play. Maintain an open angle to the pin, especially if the flag is tucked, to give yourself a better chance for an accurate putt.
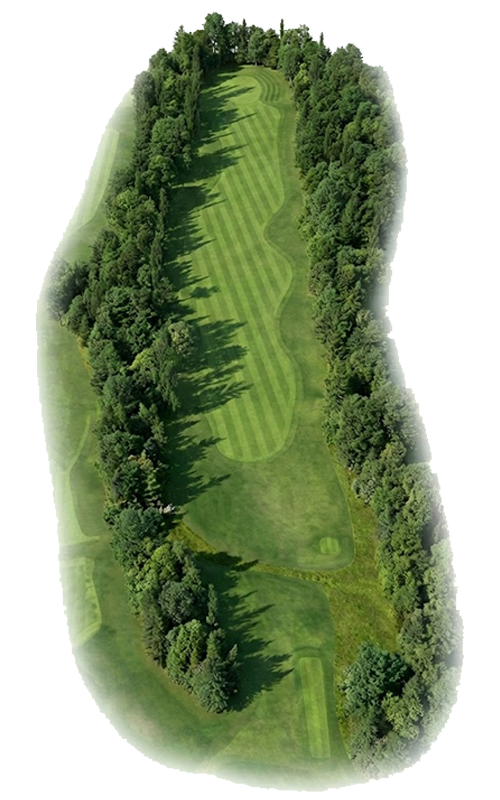
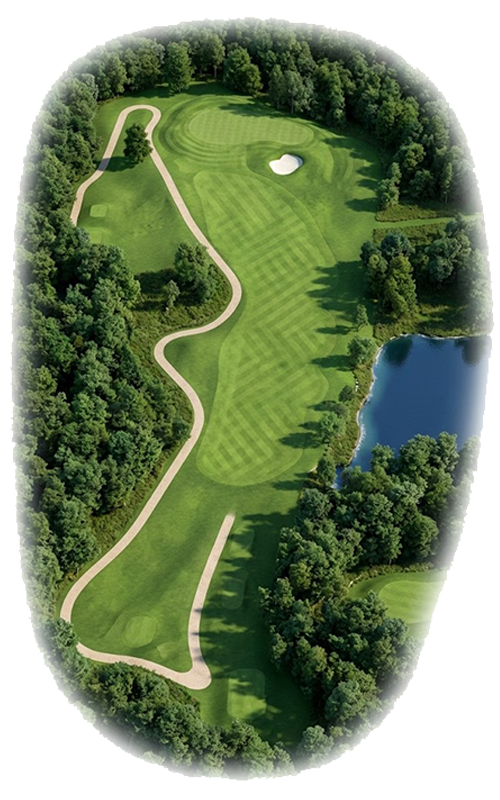
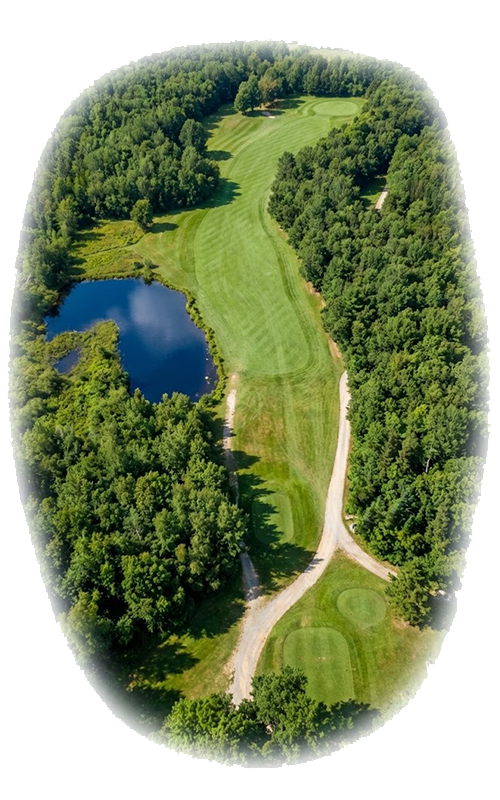
Hole 2
Yardage
Par
5
Men's Handicap
9
Women's Handicap
5
Pro Tip
Aim your drive towards the left side of the fairway to avoid potential hazards on the right and set up a clear approach to the green. For your second shot, consider a layup to a comfortable distance, ensuring you have a clear line to the green while avoiding any trees or rough. On your approach, focus on the angle to the pin; a well-placed shot from the right side of the fairway will provide a better entry into the green.
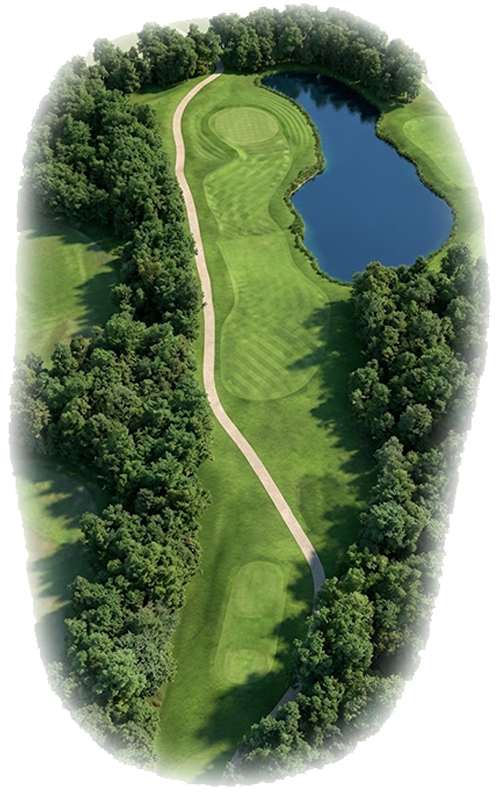
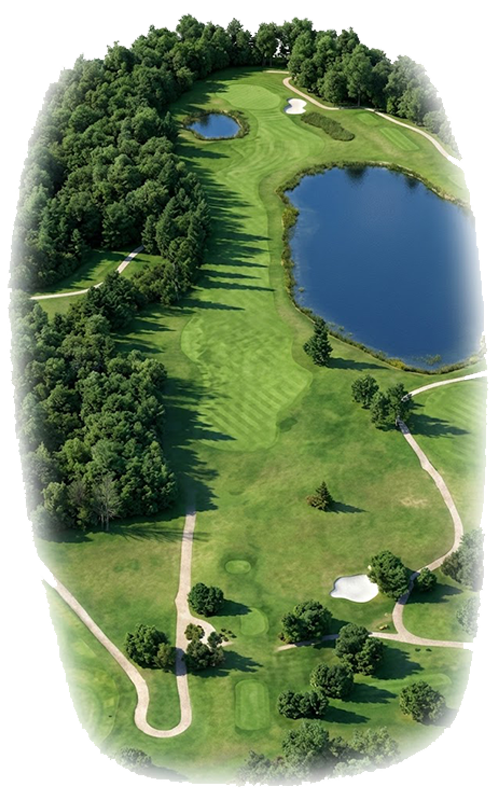
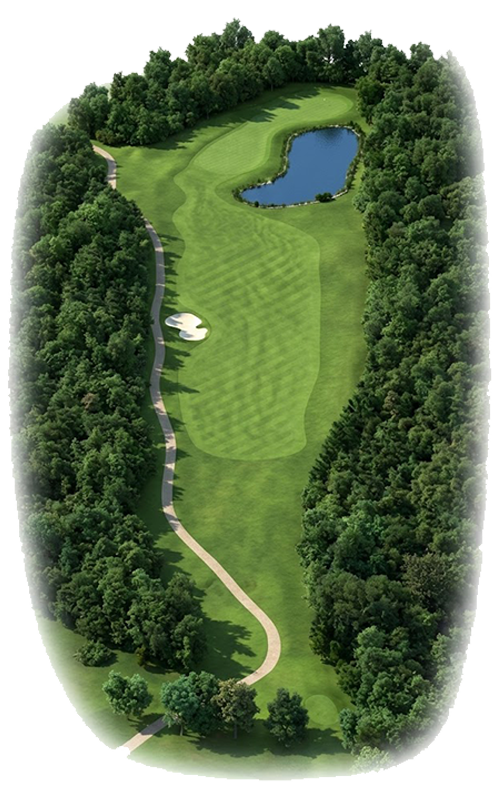
Hole 3
Yardage
Par
4
Men's Handicap
5
Women's Handicap
7
Pro Tip
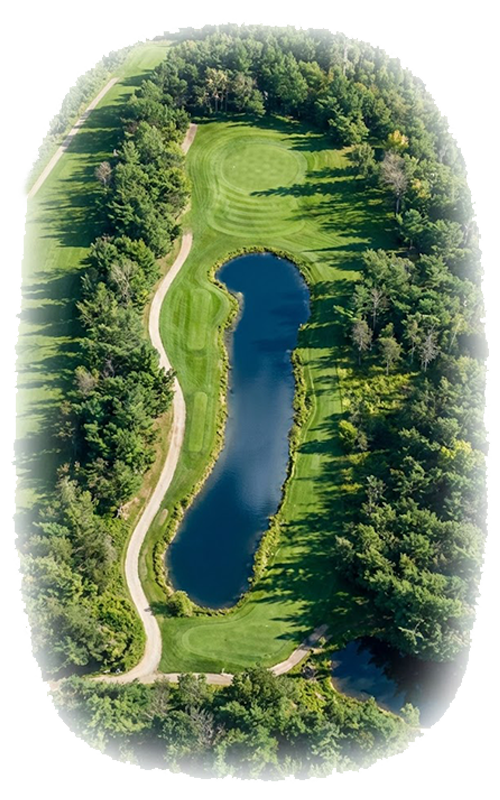
Aim for the left side of the fairway off the tee to avoid the trees and set up a clearer approach to the green. Take note of the water hazard on the right; a conservative approach to the center or left of the green will help you avoid trouble. Ensure your approach shot is well-judged to manage the elevation change and land softly on the green for an optimal putt.
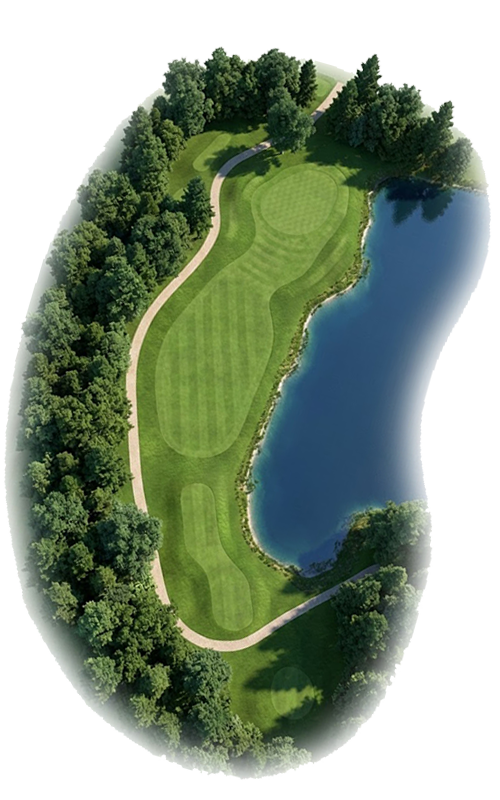
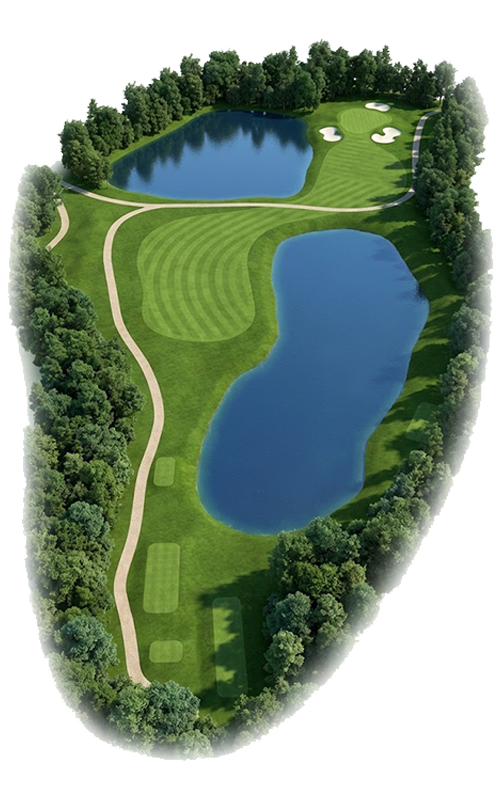
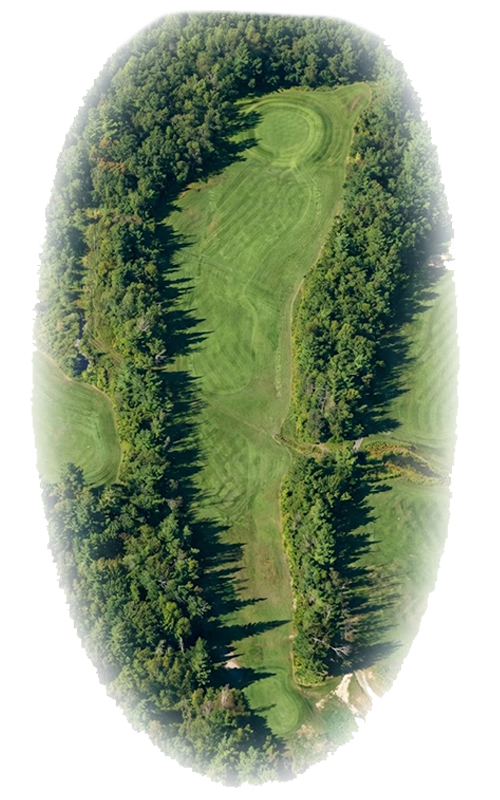
Hole 4
Yardage
Par
3
Men's Handicap
7
Women's Handicap
11
Pro Tip
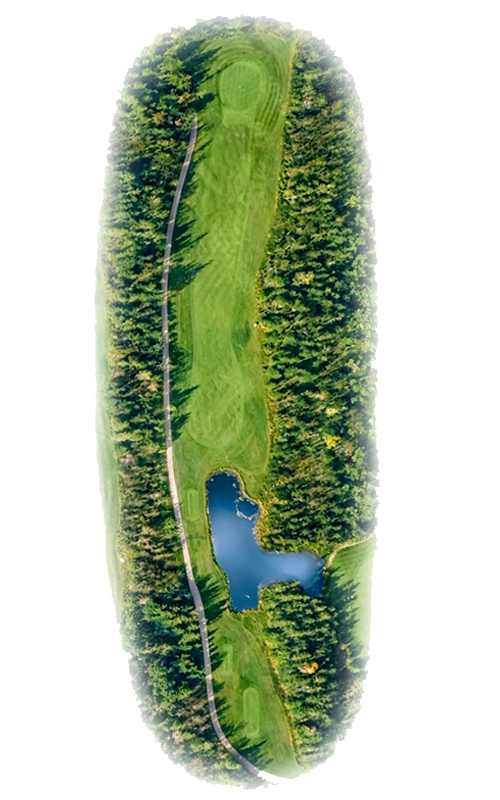
Aim for the center of the green to avoid the water hazard on the right, especially if pin placement is on that side. Consider the wind direction and select a club that allows for a controlled shot into the green, prioritizing distance over precision. If the green slopes away from you, play short to ensure an easier chip or putt rather than risking a roll into the water.
Hole 5
Yardage
Par
4
Men's Handicap
17
Women's Handicap
17
Pro Tip
Aim for the left side of the fairway off the tee to avoid the tree line on the right, which can obstruct your approach. For your second shot, focus on positioning yourself for an optimal angle to the green, preferably from the center of the fairway, as the green is likely to be narrow and well-protected. Be mindful of any hazards surrounding the green, as a conservative approach may help avoid trouble and set up an easier putt.
Hole 6
Yardage
Par
4
Men's Handicap
11
Women's Handicap
9
Pro Tip
Aim your tee shot to the right side of the fairway to avoid the hazards on the left and create a better angle for your approach. Keep your second shot short of the green to avoid the slope, which can lead to difficult chip shots. When approaching the green, prioritize accuracy over distance to ensure you can manage the challenging contours around the pin.
Hole 7
Yardage
Par
5
Men's Handicap
3
Women's Handicap
1
Pro Tip
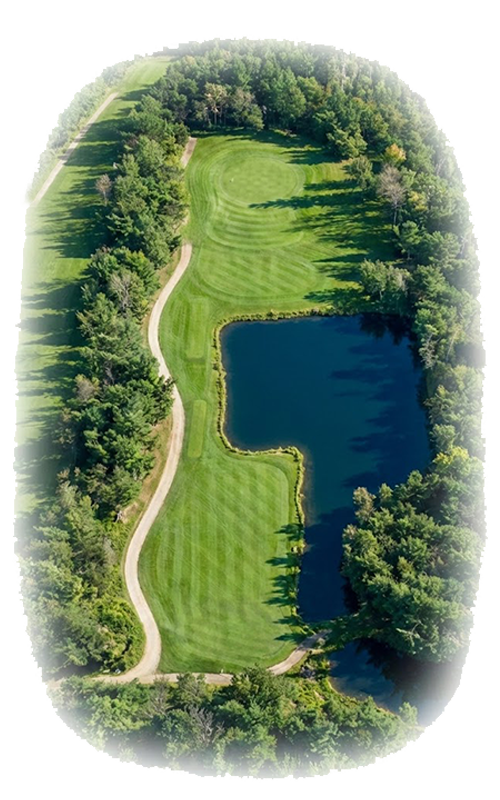
Aim your tee shot towards the right side of the fairway to avoid the water hazard on the left, setting up a more favorable angle for your second shot. For your approach, consider laying up short of the water to ensure a clear line to the green while avoiding the bunkers. If you choose to go for the green in two, ensure your distance control is precise to avoid the water and stay on the putting surface.
Hole 8
Yardage
Par
4
Men's Handicap
1
Women's Handicap
3
Pro Tip
To successfully navigate this Par 4, aim for a landing zone on the right side of the fairway to avoid the water hazard on the left. This approach will provide a favorable angle for your second shot while keeping you clear of the bunkers near the green. When approaching the green, consider the pin position to ensure you avoid any potential roll-offs into the hazards.
Hole 9
Yardage
Par
3
Men's Handicap
13
Women's Handicap
13
Pro Tip
Aim for the center of the green to avoid the bunker on the left and the trees on the right, which can complicate recovery shots. Prioritize a high approach to ensure a soft landing, especially if the pin is tucked towards the back. Consider the wind direction, as it can significantly affect your distance and club choice on this Par 3.
Hole 10
Yardage
Par
5
Men's Handicap
12
Women's Handicap
6
Pro Tip
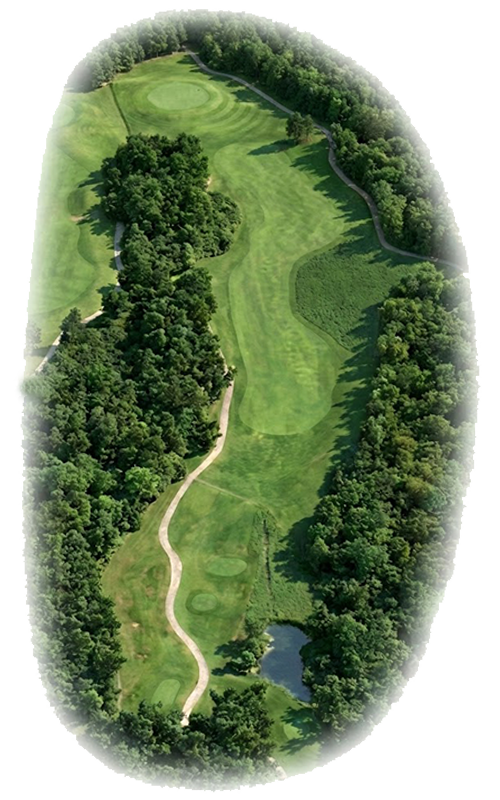
To play this Par 5 effectively, aim your drive towards the right side of the fairway to avoid the water hazard on the left. For your second shot, consider your distance and choose a club that allows a clear approach to the green, ideally from the center of the fairway to minimize tree interference. When approaching the green, favor the left side to set up for a better angle and avoid any potential obstacles on the right.
Hole 11
Yardage
Par
4
Men's Handicap
4
Women's Handicap
4
Pro Tip
Aim for the left side of the fairway off the tee to avoid the water hazard on the right, ensuring a clear approach to the green. For your second shot, take note of the pin placement and choose a club that allows you to land short of the green, as the slope will help funnel the ball towards the hole. Be cautious of the bunkers surrounding the green, as they can complicate recovery shots.
Hole 12
Yardage
Par
4
Men's Handicap
6
Women's Handicap
10
Pro Tip
Aim for the left side of the fairway off the tee to avoid the trees on the right and set up a better angle for your approach shot. The optimal landing zone for your second shot is just short of the green, as this will help you avoid the bunker on the right and allow for a favorable uphill chip. When approaching the green, focus on hitting to the center to give yourself a good chance for birdie, as the slopes can make putts tricky if you're on the edges.

Hole 13
Yardage
Par
4
Men's Handicap
16
Women's Handicap
18
Pro Tip
To play this Par 4 effectively, aim for the left side of the fairway to avoid the water hazard on the right and set up a clearer approach to the green. Your ideal landing zone should be around 220-240 yards from the tee, ensuring you have a favorable angle for your second shot. For the approach, consider the pin position; if it's toward the back, be cautious of the bunker, and choose a club that allows for a slight carry to avoid the hazard while still allowing for a good landing on the green.

Hole 14
Yardage
Par
4
Men's Handicap
18
Women's Handicap
14
Pro Tip
Aim for the left side of the fairway off the tee to avoid the trees and maximize your landing zone for a clear approach. The optimal angle for your second shot is from the left side, which provides a better line to the green and reduces the risk of running into any hazards on the right. When approaching the green, prioritize accuracy over distance, as missing the green can lead to tricky recovery shots from the surrounding rough.
Hole 15
Yardage
Par
3
Men's Handicap
10
Women's Handicap
12
Pro Tip
Aim for the front of the green to avoid the water hazard at the back, which can lead to a difficult chip or a penalty stroke. Choose a club that allows for a controlled, high shot to ensure you can stop the ball quickly on the green. Pay attention to the wind direction, as it can significantly affect your approach; adjust your aim accordingly to maintain accuracy.
Hole 16
Yardage
Par
4
Men's Handicap
2
Women's Handicap
2
Pro Tip
Aim to land your drive in the left portion of the fairway to avoid the water hazard on the right, which can come into play on both the tee shot and approach. For your approach, choose a club that allows you to carry the water and land softly on the green, keeping in mind that the best angle for an approach is from the left side of the fairway. Pay attention to the pin placement, as being too aggressive can lead to trouble, so consider a conservative shot to the center of the green for an easier two-putt.
Hole 17
Yardage
Par
3
Men's Handicap
14
Women's Handicap
16
Pro Tip
Aim for the center of the green to avoid the water hazard on the right, which can be particularly punishing for aggressive shots. Choose a club that allows for a controlled, high trajectory to ensure your ball lands softly on the green, minimizing roll and maximizing control. Pay attention to the wind direction, as it can significantly affect your approach angle and distance.
Hole 18
Yardage
Par
5
Men's Handicap
8
Women's Handicap
8
Pro Tip
Aim your tee shot toward the left side of the fairway to avoid the trees and set up a clearer approach to the green. For your second shot, consider laying up short of the water hazard, as this provides a better angle to approach the green while minimizing risk. When approaching the green, favor the right side to avoid any potential trouble from the surrounding hazards and ensure a clean line to the flag.
There are no events available at Greensmere Golf & Country Club (Legacy).
There are no public tournaments available at Greensmere Golf & Country Club (Legacy).

Come back soon to view course sponsors and special offers for golfers.
No offers available at this time.
Check back later for exclusive deals.