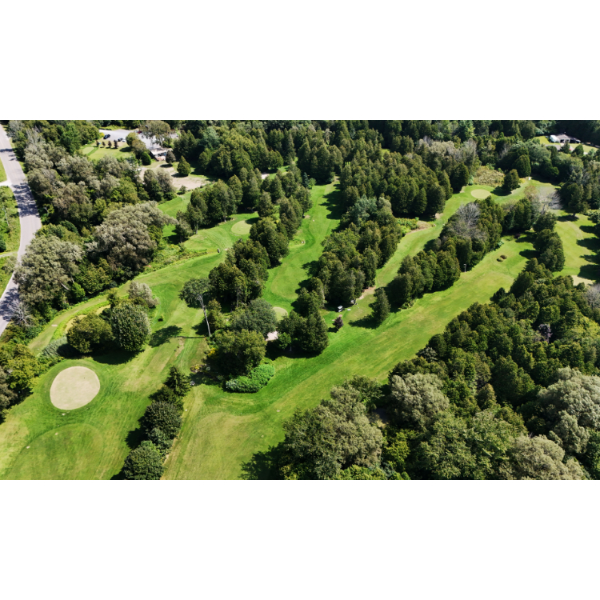
Front
Total Yards
Rating and Slope
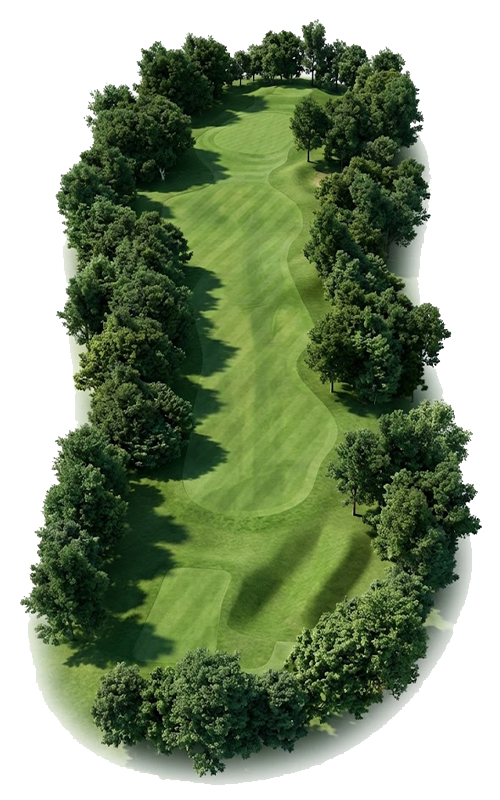
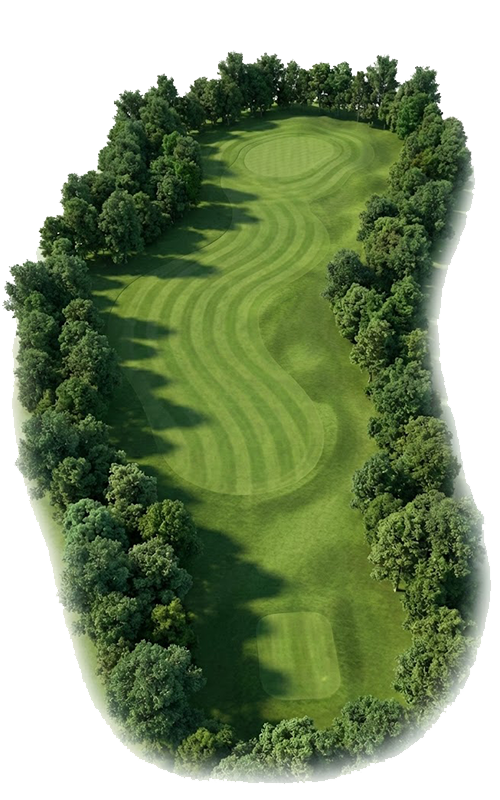
Hole 1
Yardage
Par
3
Men's Handicap
N/A
Women's Handicap
N/A
Pro Tip
Aim for a landing zone short of the green to avoid the hazards that may be present behind it, as overshooting could lead to difficult recovery shots. Focus on a high-trajectory shot to maximize your chances of holding the green, especially if the pin is tucked near the edges. Pay attention to the wind direction, as it can significantly affect your approach; adjust your club selection accordingly to maintain accuracy.
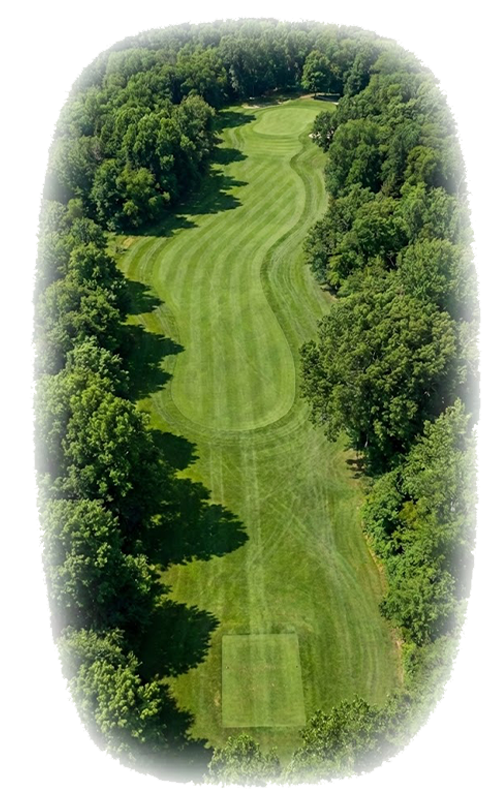
Hole 2
Yardage
Par
3
Men's Handicap
N/A
Women's Handicap
N/A
Pro Tip
Aim for the center of the green to avoid the trees lining both sides, which can create difficult recovery shots if you miss. Consider the pin position; if it’s at the back, use an extra club to ensure you clear any front hazards and avoid rolling back down the slope. Focus on a smooth, controlled swing to maintain accuracy and ensure an optimal approach angle for your next putt.
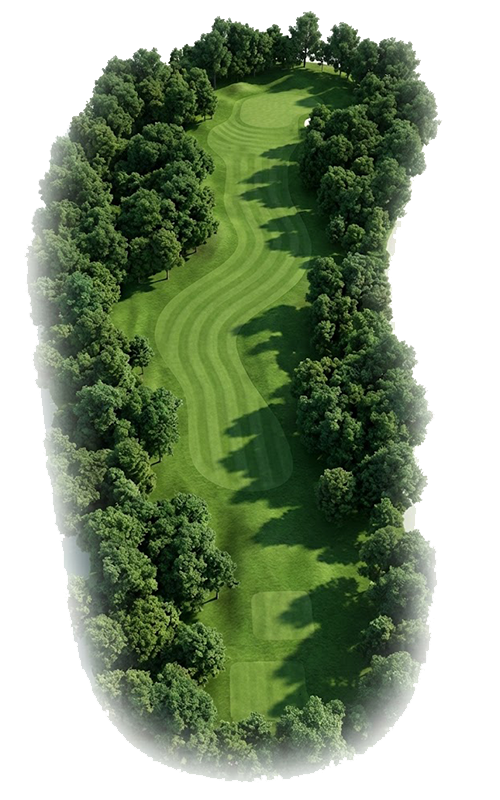
Hole 3
Yardage
Par
3
Men's Handicap
N/A
Women's Handicap
N/A
Pro Tip
Aim for the center of the green to avoid the surrounding hazards, especially if there are trees or bunkers on the edges. Determine the pin location and adjust your club selection to ensure an optimal landing zone, allowing for a safe roll onto the green. Focus on a high approach angle to minimize the risk of overshooting and landing in trouble behind the green.
Hole 4
Yardage
Par
3
Men's Handicap
N/A
Women's Handicap
N/A
Pro Tip
Aim for the center of the green to avoid the surrounding trees and hazards, giving yourself the best chance for a safe two-putt. Pay attention to the slope of the green, as it can influence the ball's roll and your approach angle; landing short may leave a challenging uphill putt. If you're feeling confident, a slight fade can help you navigate around obstacles while still targeting the pin.
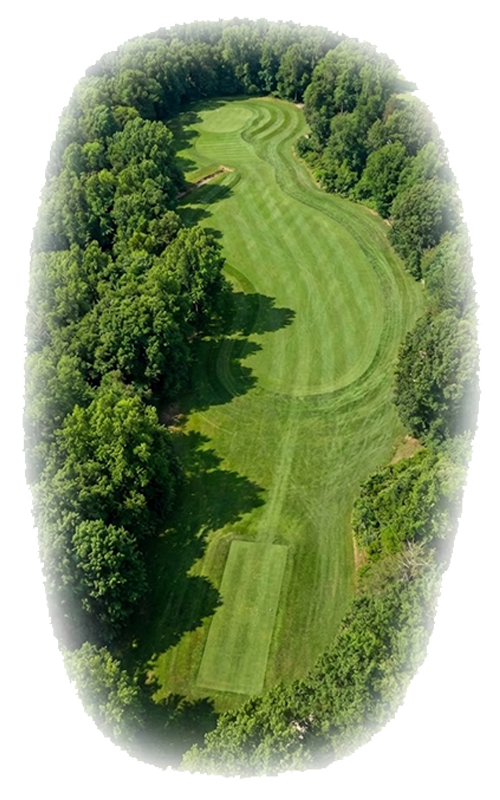
Hole 5
Yardage
Par
4
Men's Handicap
N/A
Women's Handicap
N/A
Pro Tip
Aim for the left side of the fairway off the tee to avoid the right-side hazards and maximize your landing zone for an optimal approach. This will provide a better angle for your second shot into the green, which is likely protected by bunkers. Ensure to take note of the pin position, as the green slopes can make putting challenging if approaching from the wrong angle.

Hole 6
Yardage
Par
3
Men's Handicap
N/A
Women's Handicap
N/A
Pro Tip
Aim for the center of the green to avoid the hazards on the left and right, as the trees can make recovery shots tricky. Consider the wind direction when selecting your club, as it can impact your approach angle and distance. Aiming for a spot that allows for a safe two-putt can help mitigate any potential pressure from the surrounding hazards.

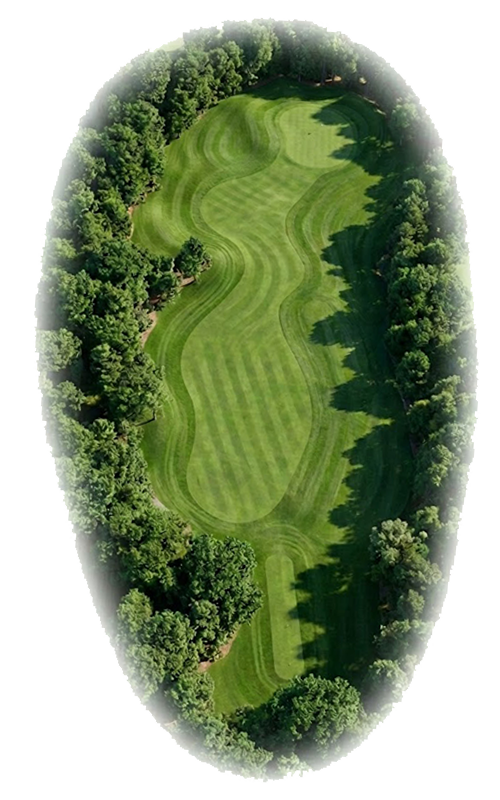
Hole 7
Yardage
Par
4
Men's Handicap
N/A
Women's Handicap
N/A
Pro Tip
Aim for the right side of the fairway off the tee to avoid the trees on the left and set up a better angle for your approach. The green appears to be well-guarded, so consider the pin position when selecting your club for the second shot; a longer club might be necessary to clear any potential hazards. Focus on landing your approach shot just short of the green to allow for a safer chip or putt, rather than risking the trouble behind the green.
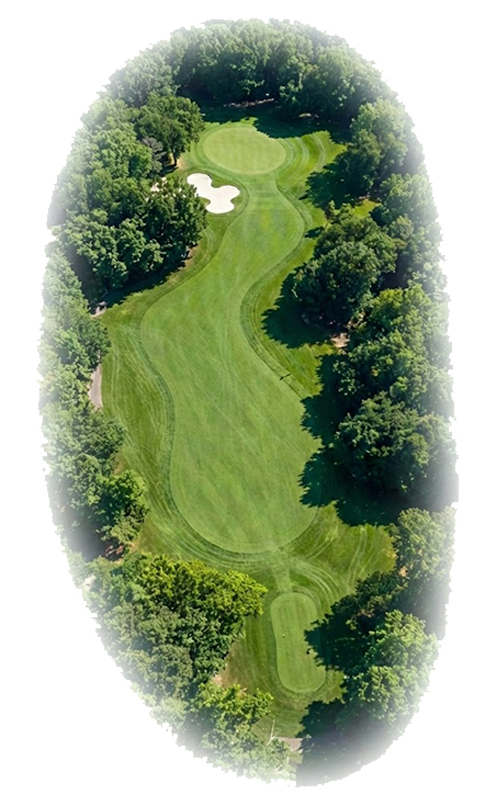
Hole 8
Yardage
Par
3
Men's Handicap
N/A
Women's Handicap
N/A
Pro Tip
Aim for the center of the green, avoiding the hazards on both sides, as they can lead to challenging recovery shots. Pay attention to the pin placement; if it's tucked near the edges, consider using a club that allows for a higher trajectory to land softly. Ensure you have the right distance and adjust for any wind conditions, as they can significantly affect your approach.
Hole 9
Yardage
Par
3
Men's Handicap
N/A
Women's Handicap
N/A
Pro Tip
Aim for the left side of the green to avoid the bunker on the right and take advantage of the slope that can help funnel the ball toward the pin. Consider the wind direction, as it may affect your approach; use a club that allows for a higher trajectory to ensure you clear any potential hazards. Be mindful of the surrounding trees, which can obstruct recovery shots if you miss the green.
There are no events available at Grafton Creekside Golf.
There are no public tournaments available at Grafton Creekside Golf.

Come back soon to view course sponsors and special offers for golfers.
No offers available at this time.
Check back later for exclusive deals.